- Accessing the Similarity Report
- Similaritiy Scour percentage rangers
- Using the Match Overview and Match Breakdown
- Viewing all sources
- Exclude quotes and bibliography
- Matches by word count or %
- Excluding sources via Match Overview
- Excluding sources via All Sources
- Restoring excluded sources
- Requesting the deletion of submissions
- Error message: "The password for this account has expired"
- Account Locked Due to Inactivity for More Than 6 Months
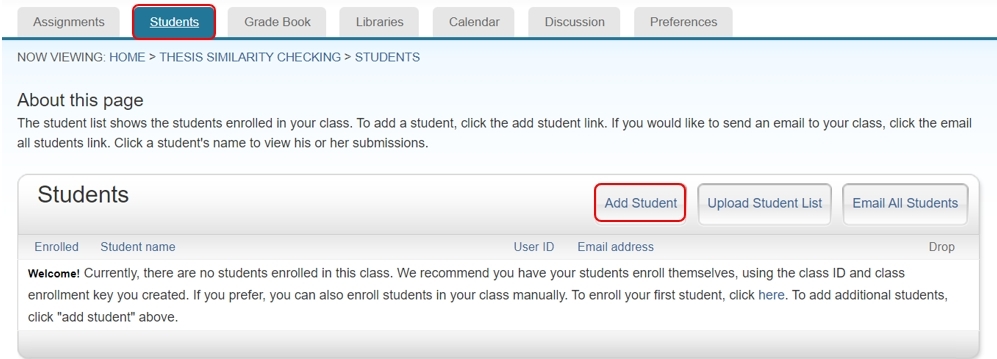
Step 1. From the class homepage, click the Students tab to open the class student list.
Step 2. Click Add Student.
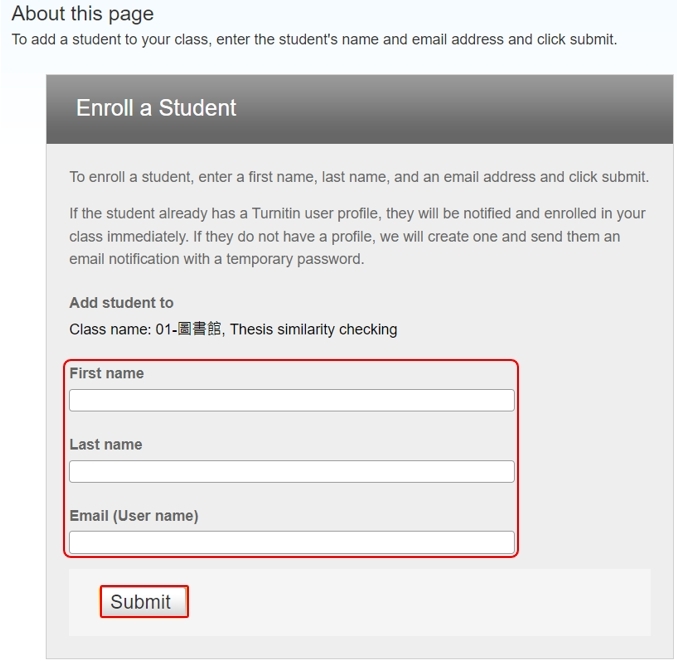
Step 3. Enter the student's first name, last name, and email address.
Step 4. Click Submit to enroll the student. A welcome email will be sent to the student.
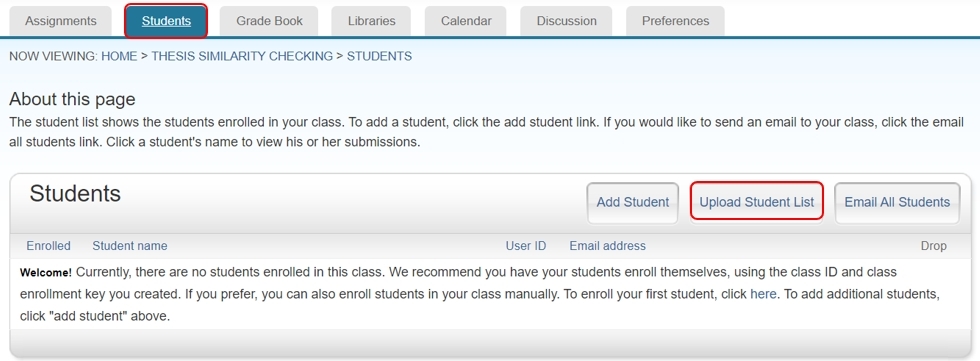
For each student, provide the information in this order: first name, last name, and email address.
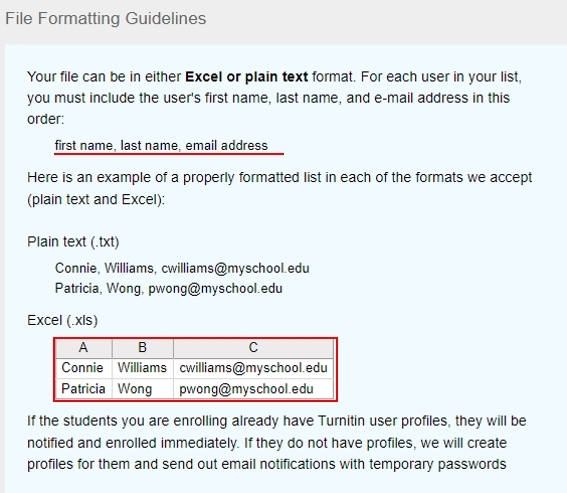
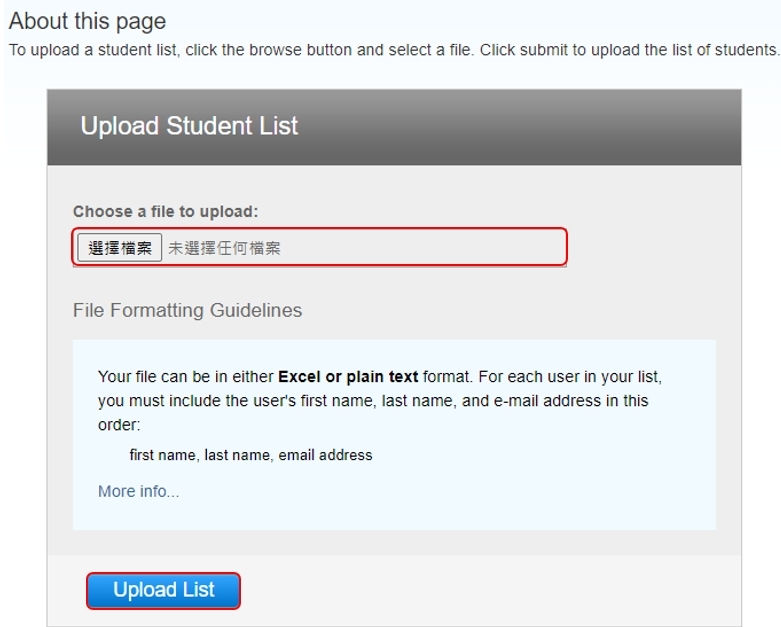
Step 3. Choose the file to upload.
Step 4. Click Submit to upload the student-list file.
Step 5. Review and confirm the student list.
Review the displayed list for errors. To enroll the listed students, click Yes, Submit. The
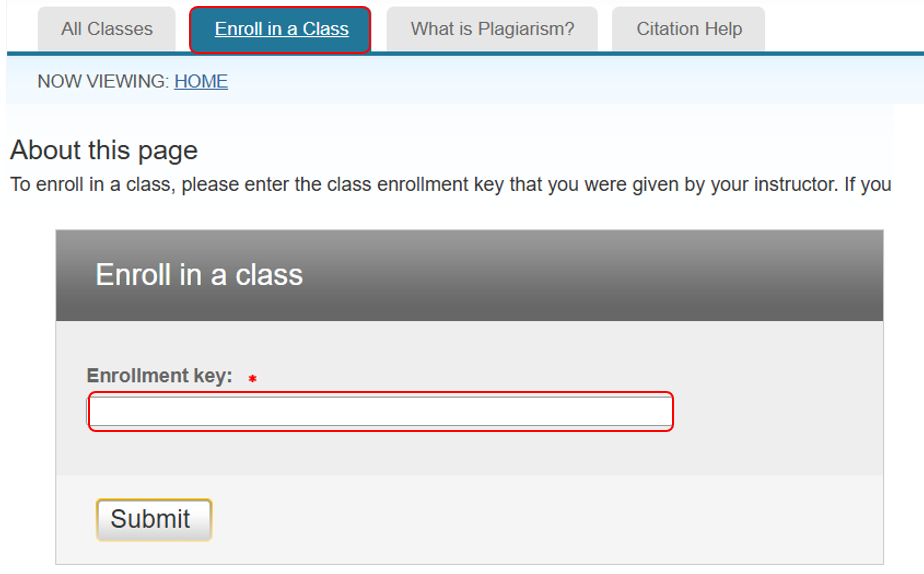
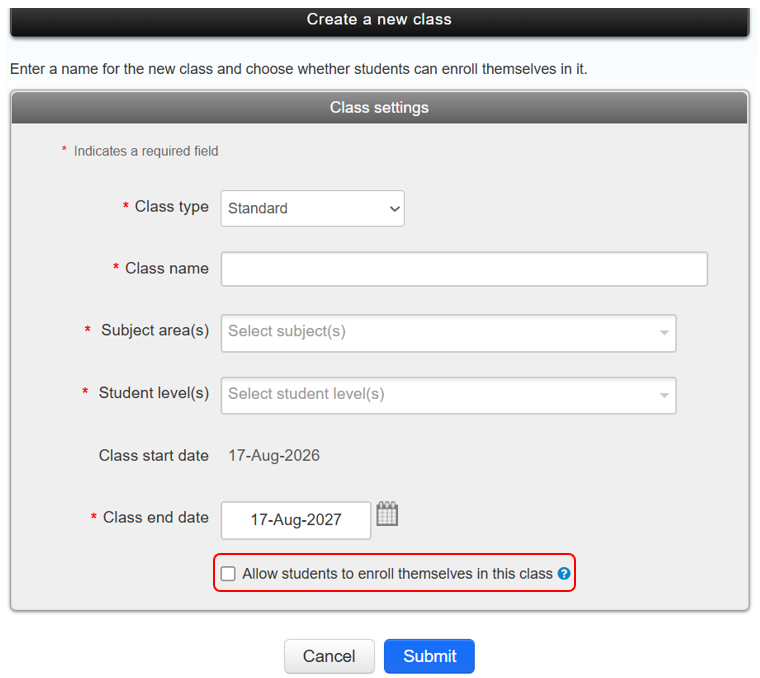
During class creation, you can choose whether students can enroll themselves.
After creating a class, the enrollment key will appear in a modal.
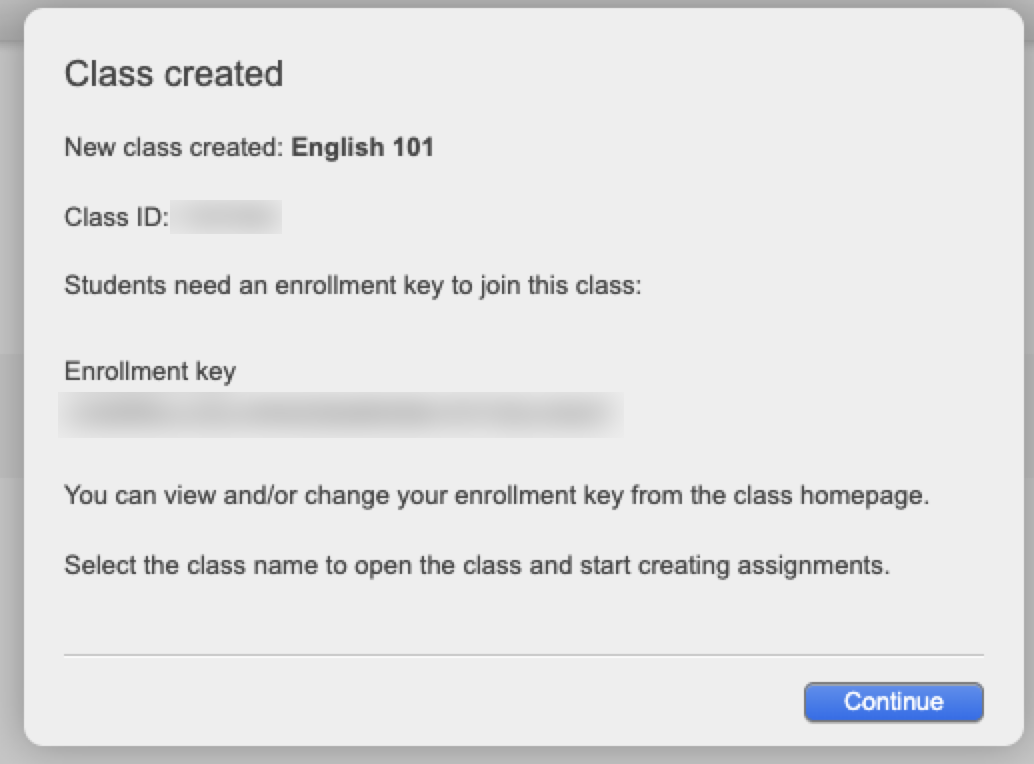
If you need to access the enrollment key after class creation, you can view it by visiting the class homepage and selecting the View Enrollment Key button. Enrollment keys are valid for 14 days, and they can be regenerated by selecting the Generate new key button.
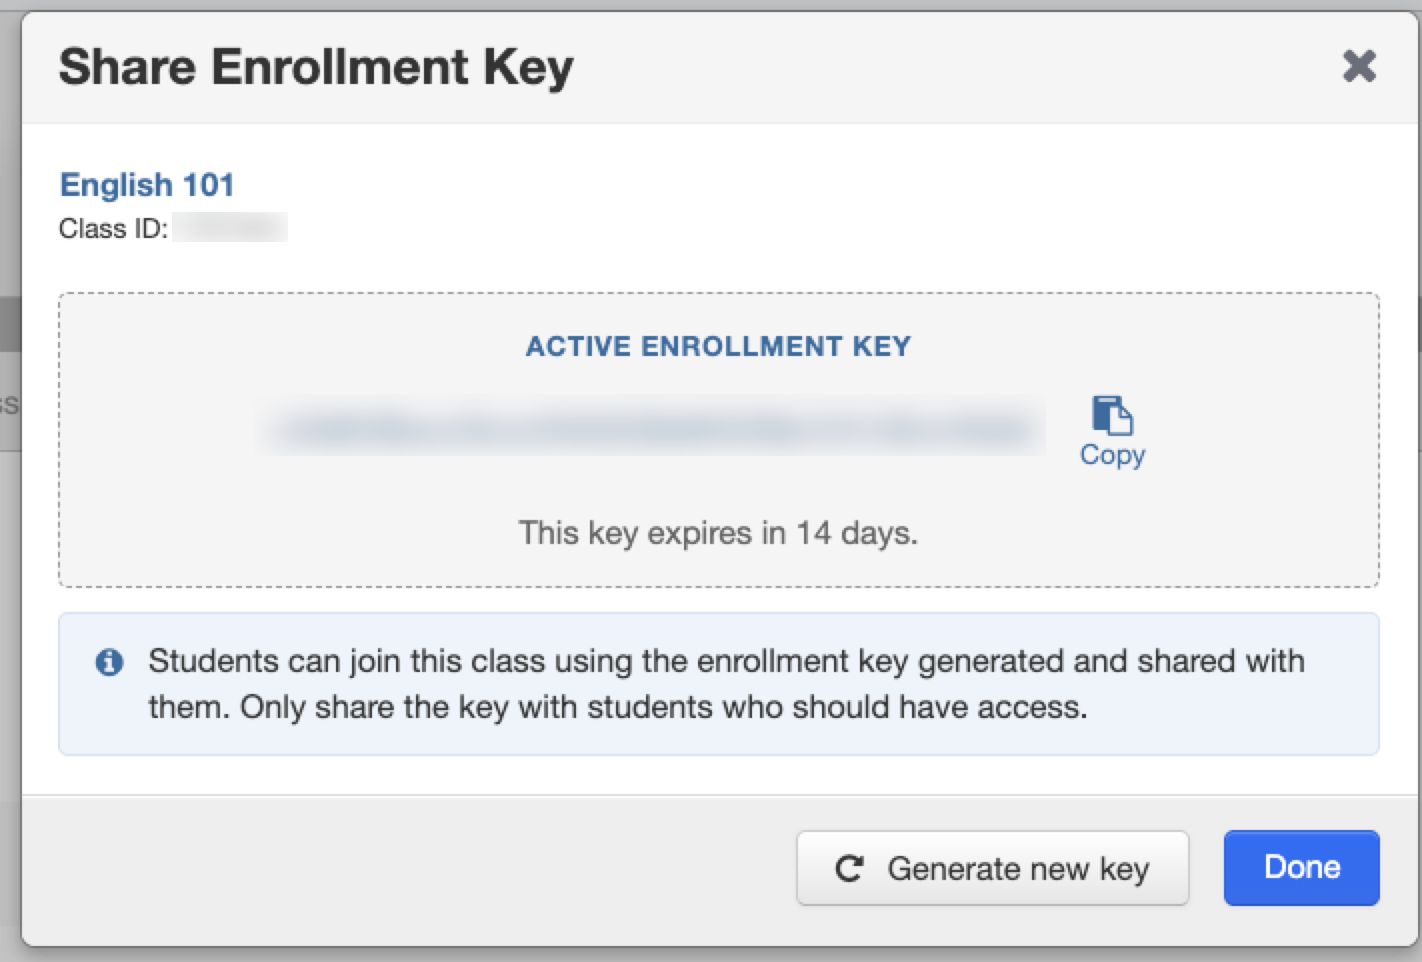
source: How student self-enrollment works
A. Students without a Turnitin account
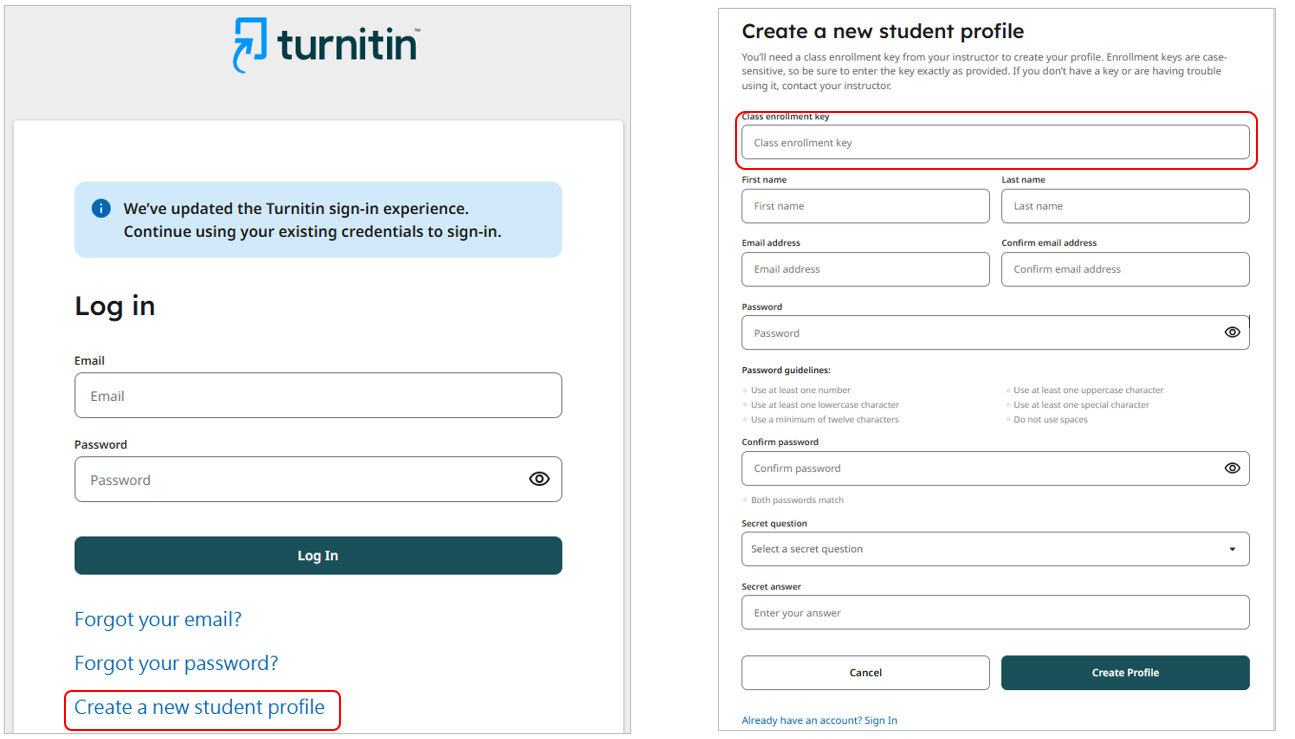
B. Students with an existing Turnitin account